
Welcome to HoverImage
What is HoverImage?
HoverImage is a plugin made by me, Alejandro Barrante Cano, which objective is to improve the performance of the "hover" and "click" functions in a gallery of images. The main behavior of the plugin is:
- When you hover on an image (included in a gallery or single), a box with a text and a background will appear.
- When you click on an image (included in a gallery or single), the entire image (including the box that appeared when you hovered) shrinks up and left, disappearing just before the page links you to the page desired.
In order to do this, I used JQuery and JavaScript. If you continue reading, below I will explain how to use the plugin easily.
THIS IS AN EXAMPLE OF THE PLUGIN

Example 2

Example 3
Where can I download HoverImage?
HoverImage is a free plugin and you can get to the source code in my github. Feel free to download the file and share it whenever you mention the authorship of the plugin.
HoverImage plugin
How to use HoverImage?
Follow these easy steps and you're plugin will be working in a few minutes:
- 1. Create the HTML. If you don't want to change the CSS included with the plugin, do it with these specifications:
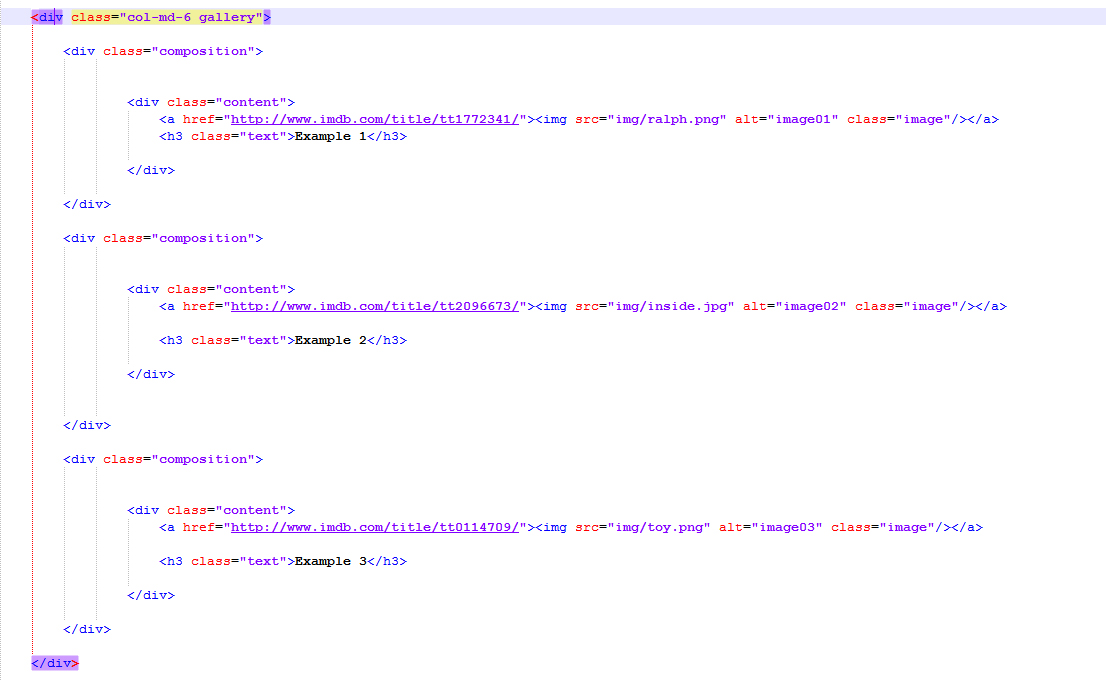
- Create a div to contain the gallery of images. It must have a class (I used .gallery).
- Create inside a second div to contain the group forme by a single image and the text that will appear when hover. The div must have a class (I used .composition). It is capital to set a class for this div, because it will be the one that will be called in the plugin in the step 4.
- Create inside a third div to contain the image and the text. It must have class (I used .content).
- Insert the image and the text. Remember to add classes to each (I used .image for the image and .text for the text).
- If you want to use the .click() function, remember to insert links to the images.
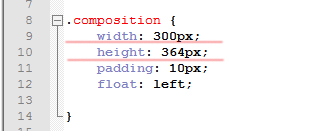
- 2. Open the file styles.css included in the plugin. Search for the css applied to the class .composition and change the width and the height to match the size of your images.
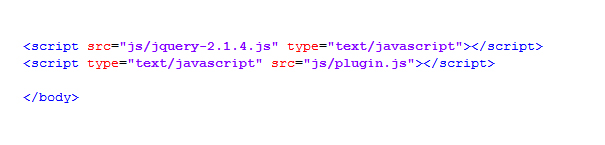
- 3. Back in the HTML, link the JQuery file and the plugin.js file just before the end of the body.
- 4. Initialize JQuery, just below the lines entered in step 3. Then introduce this line:
- 5. Check that the plugin is working in your gallery.
Example of Gallery
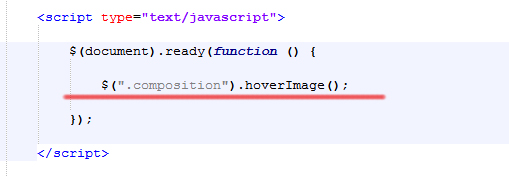
Remember that, if you changed the class .composition in Step 1, you will need to change the name of the class in the line you introduce in this step.
Final Words and Clarifications
This plugin is intended to use in few and easy steps but, as you can see, if you don't modify the CSS you are forced to use my styles. I recommend you that, if you know something about CSS, try to change the styles to accommodate your website style. If you open the styles.css file you will see that there are little styles applied.
The only two classes that you should not modify in CSS are .imagehover and .texthover, because theses classes are set in the plugin. If you want to change these names, you should open the plugin.js file and change the names of that classes in that file (but I don't recommend you to do this unless you control JQuery or Javascript).
Well, that's all, I hope this plugin-in will be useful for your websites. If you find any bug, error or improvement for the plugin, write me an e-mail to:
alejandro.barrante@gmail.com
Goodbye, and I hope you enjoy my work!